Adding captions to your videos is no longer optional; it’s essential. Captions make your content more engaging, accessible, and easier to understand, especially on social media, where viewers often watch without sound.
If you’re wondering how to add captions in CapCut, you’ve come to the right place. In this guide, we’ll cover everything from auto captions, manual captions, dynamic effects, and troubleshooting, to alternatives like RenderCut, SendShort, and Riverside for bulk video editing.
1. What Are Captions and Why They Matter
Captions are on-screen text that shows what’s being said in a video. Unlike subtitles, captions also include speaker IDs, background sounds, and other audio cues, making videos accessible for people who are deaf or hard of hearing.
Benefits of captions:
- Increase viewer engagement: Studies show videos with captions have a 12% longer watch time, and 80% more viewers watch till the end.
- Boost SEO: Search engines can read text in captions, improving video discoverability.
- Enhance clarity: Especially useful for tutorials, vlogs, and product reels where users may watch on mute.
2. CapCut Overview: Features & Accessibility
CapCut, developed by ByteDance, is a popular video editing app available on iOS, Android, Desktop, and online editors. Key features include:
- Auto captions: Transcribe speech into text automatically.
- Manual captions: Customize every caption with text layers, fonts, colors, and animation.
- Preset templates and dynamic captions: Add engaging animation effects.
- Export options: SRT, TXT, MP4, and other formats for different platforms.
While CapCut is powerful, some advanced features are locked behind Pro subscriptions, making alternatives like RenderCut, SendShort, and Riverside worth considering, especially for bulk editing or enhanced automation.
3. Step-by-Step Guide to Adding Captions in CapCut
A. Auto Captions
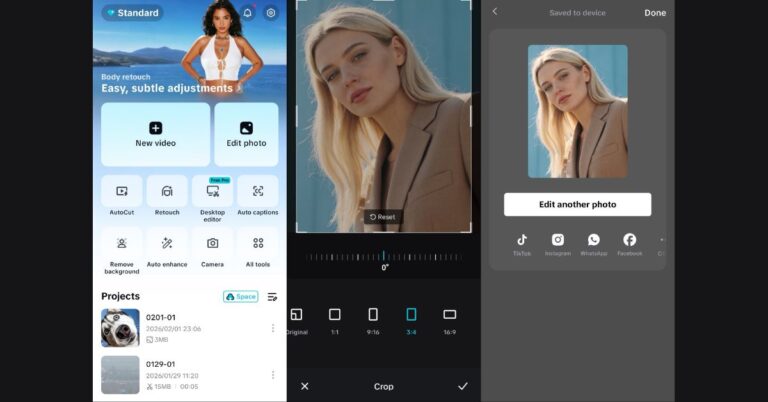
- Open your project in CapCut
Tap Text > Auto Captions. Choose the audio source: original video audio, voiceover, or imported sound. - Select language and accuracy settings
Choose the correct language, e.g., English or Hindi. Clear audio improves speech-to-text AI accuracy. - Adjust timing and sync
CapCut auto-syncs captions, but drag the timeline to adjust start and end times for perfect synchronization.
B. Manual Captions
- Add text layers manually
Tap Text > Add Text and type your caption. Place it on the timeline where it matches the audio. - Customize font, size, and position
Use readable fonts, high contrast, and animation effects to make captions stand out. - Best practices for short-form videos
- Keep captions short and punchy
- Use bold text or color for emphasis
- Place at the bottom center for mobile viewers
C. Dynamic Captions & Animation
- Apply Animation effects under the Text tab.
- Save your style as a preset for consistent branding.
- Combine with compound layers for complex captions.
Dynamic captions increase engagement and make videos more visually appealing.
4. Exporting Captions: SRT, TXT, and Video Formats
- SRT/TXT: Useful for YouTube, other platforms, or multilingual translation.
- Video with embedded captions: MP4 export includes styled captions.
- Tip: Choose the resolution, frame rate, and format to match the platform—Instagram, TikTok, or YouTube Shorts.
5. Tips to Improve Your Captions
- Font readability: Large, high-contrast text is easier on mobile screens.
- Background color or outline: Makes captions visible against busy visuals.
- Sync precisely: Ensure captions appear in time with audio.
- Emphasize key words: Bold or color important phrases to highlight info.
- Apply changes globally: Use “Apply to All” when editing multiple captions.
Read More: How to blur faces in Capcut
6. Troubleshooting Common CapCut Caption Issues
| Issue | Solution |
|---|---|
| Captions out of sync | Adjust timeline bars manually |
| Auto caption errors | Ensure correct language & clear audio |
| Font/style not applying | Check selection & Pro feature restrictions |
| Auto caption not generating | Check internet connection, app updates, or monthly limit |
| Export freezes | Reduce resolution, close background apps, ensure storage space |
7. CapCut vs Alternatives: RenderCut, SendShort, Riverside
| Tool | Best For | Key Advantages |
|---|---|---|
| CapCut | General video editing | Manual & auto captions, effects, mobile + desktop |
| RenderCut | Bulk video captioning | Automatic captions, emojis, stylish fonts, multi-export |
| SendShort | Quick short-form videos | Free auto captions, AI detection, minimal editing |
| Riverside | Professional video + captions | Accurate speech-to-text, 48kHz audio, SRT/TXT export, noise remover |
Conclusion:
Learning how to add captions in CapCut is crucial for creating accessible and engaging content. Whether you choose manual precision or auto-generated captions, CapCut provides the tools to enhance your video’s readability.
For bulk video projects, dynamic captions, and time-saving workflows, tools like RenderCut, SendShort, and Riverside offer superior automation, better AI, and professional results.
Frequently Asked Questions
Q1: Are auto captions free on CapCut?
Yes, but limited to 5 free generations per month. Pro removes restrictions.
Q2: How do I edit captions in CapCut?
Use Text > Auto Captions or Text > Add Text, then adjust font, color, and timing on the timeline.
Q3: Can I export captions as SRT or TXT?
Yes, on the desktop or online editor. Useful for YouTube or translations.
Q4: How to make dynamic captions?
Apply Animation effects to captions under the Text tab.