Editing videos has become an essential part of modern content creation. Whether you are a TikTok creator, YouTube vlogger, Instagram Reels enthusiast, or someone who simply enjoys adding creativity to personal clips, learning new editing tricks can help your videos stand out.
One of the most popular effects people search for today is how to reverse video on CapCut, since it instantly transforms ordinary footage into something eye-catching and fun.
One of the most fascinating yet simple tricks is the reverse video effect. If you’ve ever wondered how to reverse video on CapCut, this guide will walk you through every detail, from basic steps to advanced tips.
By the end of this article, you’ll not only know how to reverse video clips but also understand how to integrate transitions, filters, and audio adjustments for polished results.
Why Reverse a Video in CapCut?
Before diving into the technical steps, it’s important to understand why reversing a video is such a popular effect. Reversed clips offer a unique perspective on everyday actions. They make viewers stop scrolling, watch twice, and even share because the effect feels playful and unexpected.
For example, imagine a clip of someone tearing a piece of paper. Played forward, it looks ordinary. But when reversed, the paper magically comes back together. Similarly, water splashes appear hypnotic in reverse, as if nature is bending in unexpected ways.
CapCut makes these edits simple, whether you’re learning how to reverse video on CapCut or even exploring other features like how to cancel CapCut subscription when you no longer need the premium plan.
Step-by-Step Guide: How to Reverse Video on CapCut
Reversing a video on CapCut is surprisingly straightforward. However, each device (iPhone, Android, or desktop PC) has slightly different steps. Below is a detailed breakdown:
Reversing Video on CapCut (Mobile – iPhone/Android)
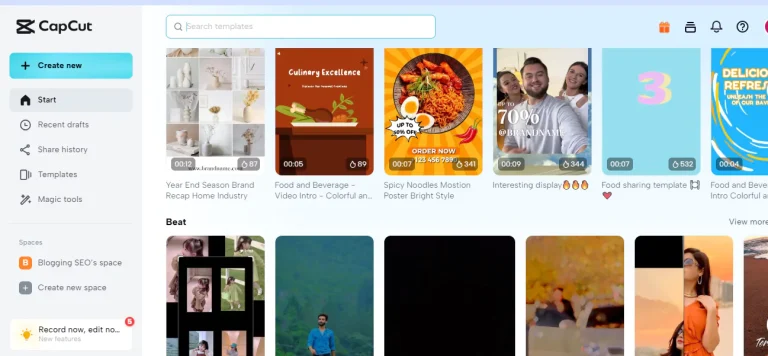
- Open the CapCut app on your smartphone.
- Tap New Project and select the video you want to edit.
- Once imported, tap the clip in the timeline to highlight it.
- In the bottom toolbar, scroll until you see the Reverse option.
- Tap Reverse. CapCut will process the clip (processing time depends on length).
- Play it back to confirm the effect.
- Add transitions, filters, or audio adjustments if desired.
- Export the video in your preferred resolution (720p, 1080p, or 4K).
Reversing Video on CapCut (PC/Desktop)
CapCut has also launched a desktop version for both Windows and macOS. The reverse process here is just as intuitive:
- Launch the CapCut desktop app.
- Import your video by dragging it into the timeline.
- Right-click on the clip and select Reverse Video.
- Wait while the software processes the reversal.
- Preview the reversed sequence, then enhance with transitions, slow motion, or overlays.
- Export the final video in MP4 format, optimized for TikTok, YouTube, or Instagram.
Table: Key Differences Between Mobile and Desktop Reverse
| Feature | Mobile (iPhone/Android) | Desktop (Windows/Mac) |
|---|---|---|
| Ease of Use | Very simple, tap based | Simple, right click |
| Processing Speed | Depends on device power | Usually faster on PC |
| Editing Flexibility | Great for quick edits | Better for advanced workflows |
| Export Options | 720p–4K | 720p–4K with extra formats |
| Best For | Social media creators | Long form editors |
Enhancing Reversed Videos with Extra CapCut Features
Reversing alone can be fun, but combining the reverse effect with other CapCut tools can elevate your content. Let’s explore some of the best complementary features:
Adding Slow Motion or Speed Control
A reversed clip paired with slow motion creates an ultra-dramatic vibe. For example, reversing a glass shattering in slow motion looks like magic. In CapCut, you can adjust speed by tapping the Speed tool. Options include Normal (gradual changes) or Curve (dynamic speed ramps).
Using Filters and Color Adjustments
CapCut includes a variety of filters like Retro, Dreamy, Cinematic, and Moody. Applying a filter to a reversed clip gives it thematic consistency. Color adjustments like brightness, contrast, and saturation can also help make the clip more visually striking.
Syncing Reversed Clips with Music
Music is crucial for social media content. Try syncing reversed actions with beats. For example, reversing someone jumping as the beat drops makes for a powerful TikTok moment. CapCut’s Auto Beat Sync can help match your clip to any chosen audio track.
Adding Text and Stickers
To grab attention, overlay text like “Wait for the magic…” or “Watch closely.” Stickers and animated emojis can also add humor or context.
Common Mistakes to Avoid When Reversing Video in CapCut
Even though reversing is simple, beginners often make small errors that reduce impact:
- Overusing the effect: Reversing too many clips in one video can feel gimmicky.
- Forgetting sound design: When reversing video, the audio also reverses, which usually sounds odd. It’s better to mute and replace with music or sound effects.
- Low quality export: Always export in the highest resolution available for your platform. TikTok looks best in 1080p, while YouTube can support 4K.
- Not trimming first: Reverse only the relevant section of the clip, not unnecessary parts.
Read more: Is Capcut Getting Banned
Creative Ideas for Reversed Videos
Here are some ideas to inspire your next project:
- Lifestyle content: Reversing coffee pouring back into the cup.
- Travel vlogs: Waves retreating from shore instead of crashing.
- Sports edits: Basketball flying back out of the hoop.
- Comedy skits: Someone eating food in reverse.
- Product ads: Unboxing items backward to create curiosity.
Final Thoughts:
Reversing a video might seem like a small effect, but in the fast-paced world of TikTok, Instagram Reels, and YouTube Shorts, small details often decide whether someone scrolls past or engages with your content. With CapCut’s free, user-friendly tools, anyone can apply the reverse effect in just a few taps or clicks.
So the next time you want to make your content more engaging, remember this guide. Learn how to reverse video on CapCut, experiment with creative applications, and always refine your exports for the highest quality. By blending technical steps with creative flair, you’ll produce videos that surprise, entertain, and captivate your audience.
Frequently Asked Questions
1. Does reversing a video reduce quality?
No, CapCut preserves quality when reversing, but exporting in low resolution can reduce clarity. Always export at 1080p or higher.
2. Can I reverse only part of a video?
Yes. Trim your clip in CapCut before applying the reverse tool. This ensures only the desired section is reversed.
3. Can I reverse audio separately?
CapCut automatically reverses video and audio together. To avoid distorted sound, mute the audio and add new music.
4. Is reversing available on free CapCut or only Pro?
The reverse feature is available in the free version. CapCut Pro adds extras like cloud storage, premium filters, and stock footage.
5. Can I reverse video on CapCut online without the app?
Yes, CapCut has an online editor where you can upload clips and reverse them directly in your browser.